To level Rogue RML-490 rack uneven concrete floors, the fastest reliable method is to map the high and low spots with a 4-foot bubble level, then place tapered galvanized steel shims under the low feet until each upright sits flush and plumb. For slopes greater than 1/2 inch across the rack footprint, install threaded leveling feet on each upright or pour a self-leveling underlayment beneath a 3/4-inch plywood platform. Never bolt the rack down until it is plumb in both axes, or you will torque the uprights and create a wobble that no amount of weight on the base can fix.
This guide walks through diagnosing the slope, the three viable leveling methods for a 1,000+ lb rated rack, and how to verify everything stays true after a few heavy squat sessions. The RML-490 is a six-post, 3x3 inch 11-gauge monster, and getting it dead flat is the single biggest factor in whether your J-cups rattle, your safeties bind, or your pull-up bar squeaks under load.
Why the RML-490 Is Sensitive to an Uneven Floor
Top Picks

Most garage slabs are poured with a deliberate 1/8 inch per foot slope toward the door for drainage. Across the 49-inch depth of an RML-490, that adds up to roughly 1/2 inch of drop from back to front, and old slabs often have additional cupping, settling cracks, or trowel waves. Because the RML-490 uses a welded base only on the front and rear cross-members (the uprights themselves are independent feet), any twist in the floor translates directly into a twist in the frame.


The symptoms show up fast. Pin-and-pipe safeties will sit at slightly different heights left to right. J-cups will rock under a loaded barbell. The flip-down safeties (if you added them) will bind when you try to raise them. And if you bolt the rack into a twisted position, you are pre-loading the welds every time you rack a heavy squat. Spending an afternoon to level Rogue RML-490 rack uneven concrete properly is the cheapest insurance you will ever buy.

Step 1: Map the Slope Before You Move the Rack
Before you slide 250 pounds of steel into position, you need to know exactly what you are dealing with. Place a 4-foot machinist's level or a 48-inch box level across the spot where each pair of feet will land. Take readings in both directions and write the gap measurements directly on the concrete with a pencil or chalk.
- Front-to-back slope: Measure across the 49-inch depth at three points (left rail, center, right rail).
- Left-to-right slope: Measure across the 49-inch width at the front uprights, the middle, and the rear uprights.
- Localized dips: Slide a straightedge across each foot location and use feeler gauges or a stack of business cards to measure gaps under 1/8 inch.
If your worst gap is under 1/4 inch, shims alone will solve it. Between 1/4 and 1/2 inch, threaded leveling feet are the cleanest answer. Over 1/2 inch, you should seriously consider a leveled plywood platform or self-leveling compound, because shim stacks taller than that are unstable under cyclic squat loads.
Step 2: Choose Your Leveling Method
Method A: Galvanized Steel Shims (Up to 1/4 Inch)
Tapered steel shims (often sold for structural framing) are the gold standard for small corrections. Avoid plastic shims, which compress and creep under sustained 600+ lb loads. Stack two shims point-to-point under each low foot so the load bears across the full footprint, not on a knife edge. Use a rubber mallet to seat them, then re-check with the level.
Method B: Threaded Leveling Feet (Up to 1/2 Inch)
Rogue does not include leveling feet on the RML-490, but the 1/2-13 bolt holes in the base plates accept aftermarket M12 or 1/2-inch threaded leveling mounts. These give you 1/4 to 3/4 inch of vertical adjustment per foot and let you fine-tune each upright independently after the rack is assembled. They also isolate the rack from minor moisture migration through the slab, which matters in unconditioned garages.
Method C: Plywood Platform with Self-Leveling Underlayment (Over 1/2 Inch)
For seriously out-of-flat slabs, build a 6x8 foot platform from two layers of 3/4-inch plywood with a sheet of horse-stall mat or 8mm rubber on top. Before you lay the plywood, pour a thin coat of self-leveling cementitious underlayment (Henry 555, LevelQuik RS, or similar) in the dips. This is more work, but it gives you a rock-solid, sound-deadening lifting station that also protects the slab from dropped plates.
Step 3: Bolt Down Only After Verifying Plumb
The RML-490 is rated for free-standing use, but if you live in a region with seismic activity or you do a lot of kipping pull-ups, anchoring to the slab is wise. Use 1/2 inch x 3-3/4 inch wedge anchors with at least 3 inches of embedment. Critical rule: tighten each anchor only finger-tight, verify the uprights are still plumb with the level on two adjacent faces, then torque to spec in a star pattern, re-checking plumb after each pass. If anything moves, back off and re-shim. Our guide to bolting a rack to concrete covers the anchor selection and torque specs in detail.
Outfitting the Rest of Your Garage Gym
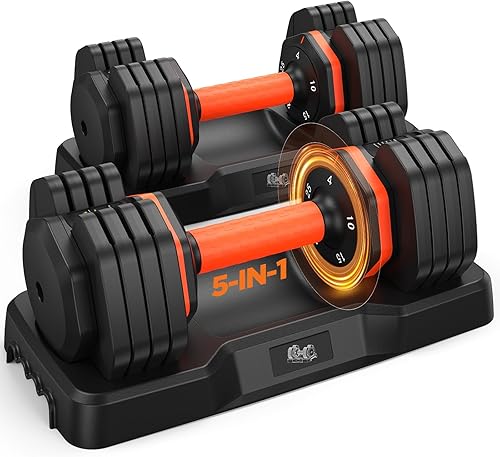
Once the rack is dead level, the next priority for most lifters is a versatile pair of adjustable dumbbells. They eat far less floor space than a full dumbbell rack and let you run accessory work between sets in the cage. Below are picks that pair well with an RML-490 setup in a one- or two-car garage.
| Model | Weight Range | Adjust Mechanism | Best For |
|---|---|---|---|
| BowFlex Results SelectTech | 5-100 lb (pair) | Dial | Heavy press & row accessory work |
| FEIERDUN DS2 | 20-90 lb (pair) | Pin + connector | Loaded carries, can join to barbell |
| FDB2 with Stand | 10-110 lb (pair) | Pin | Lifters who want a docked storage stand |
| Amazon Basics Adjustable | 3-25 lb | Threaded collar | Warmups, rehab, light accessories |
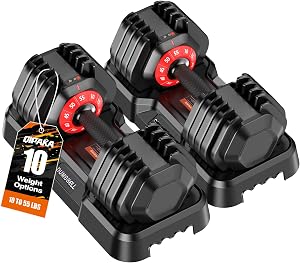
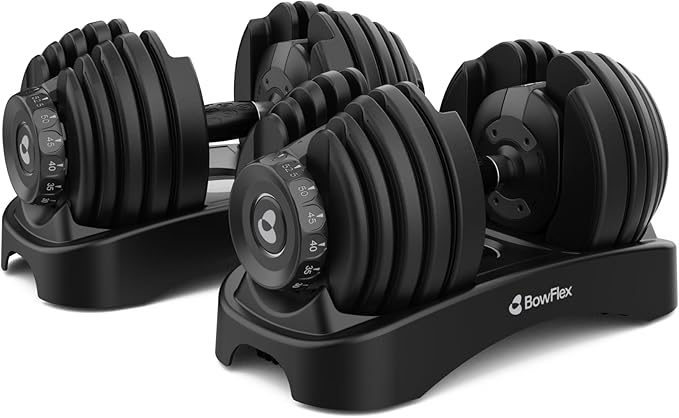
BowFlex Results Series SelectTech Adjustable Dumbbells
The Results Series is the new generation of BowFlex SelectTech, with a higher 100 lb top end per hand and a refined dial that resists accidental partial selections. For a lifter strong enough to need an RML-490, the upper range matters because a 50 lb cap (the old 552 limit) gets outgrown fast on rows and floor presses. The compact base also tucks neatly under the rack's spotter arms. Check the BowFlex Results Series on Amazon.
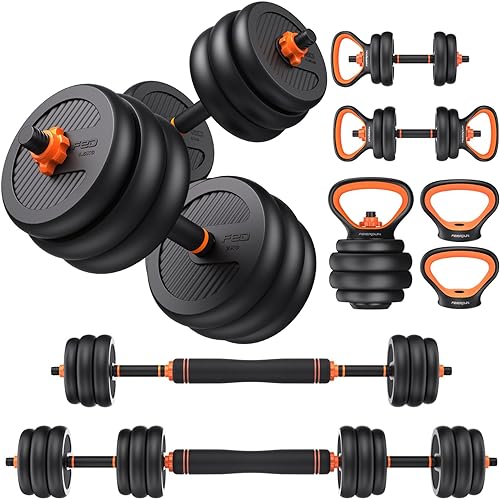
FEIERDUN DS2 Adjustable Dumbbells with Connector
The DS2's killer feature is the included connector bar that joins the two dumbbells into a short, loadable barbell up to 180 lb. That is genuinely useful for landmine work, Z-presses inside the rack, and Pendlay-style rows when you do not want to load the 45 lb Olympic bar. The pin-lock mechanism is also less finicky than dial systems in cold garage temperatures. See the FEIERDUN DS2 on Amazon.
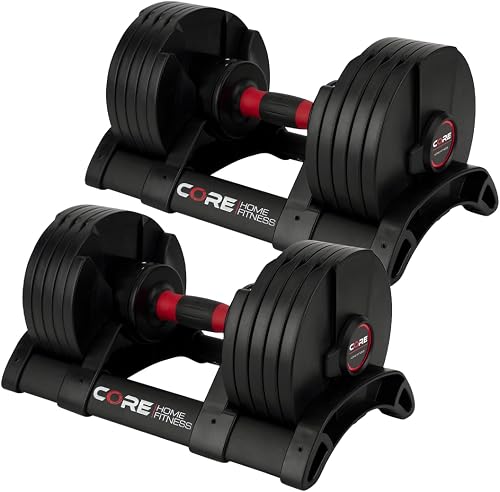
FDB2 Adjustable Dumbbell Set with Storage Stand
If you do not want adjustable dumbbells rolling around on a freshly leveled platform, the FDB2 ships with a vertical stand that keeps both handles docked at chest height. The 110 lb top end is also the highest in this group, which makes it the better long-term pick for heavy DB bench and split-squat work. Pair it with the rack's spotter arms set low for safe heavy DB pressing. View the FDB2 set on Amazon.
Amazon Basics Adjustable Dumbbell Set with Storage Case
For lifters who already own a primary heavy pair and just need a budget set for warmups, mobility, and accessory finishers, the Amazon Basics threaded-collar set is hard to beat at the price. The included case keeps the spinlock plates organized and off your level platform. See the Amazon Basics adjustable set on Amazon.
Verifying Your Level Job Holds Up
After the first heavy squat session (anything over 315 lb), re-check the rack with your 4-foot level. Shim stacks can settle slightly under cyclic load, and brand-new wedge anchors will sometimes seat another 1/16 inch into the concrete. If you see new movement, repeat the plumb-check process. From there, do a quarterly inspection: level both axes, check that all base bolts are still at torque, and look for any new hairline cracks in the slab radiating from the anchor points.
For more on building out a compact garage setup around a six-post rack, see our 2026 power rack buyer's guide and our breakdown of home gym flooring options for uneven slabs.
Frequently Asked Questions
Can I level a Rogue RML-490 rack without bolting it to the floor?
Yes. The RML-490's six-post footprint and 1-inch hardware make it stable free-standing for most use cases, including squats up to its rated capacity. You still need to shim the feet so all six contact points share the load evenly; otherwise the rack will rock under heavy walk-outs. Leveling feet are the cleanest free-standing solution because they let you fine-tune without disassembly.
How much slope is too much for a power rack on garage concrete?
Anything beyond 1/2 inch of total drop across the rack's 49-inch footprint should be corrected with either threaded leveling feet or a plywood platform with leveling compound underneath. Shim stacks taller than 1/4 inch start to flex under cyclic squat loads and can shift over weeks of training. If your slab drops more than 1 inch across the rack, build a dedicated platform instead.
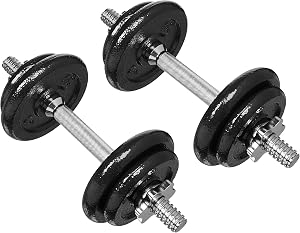
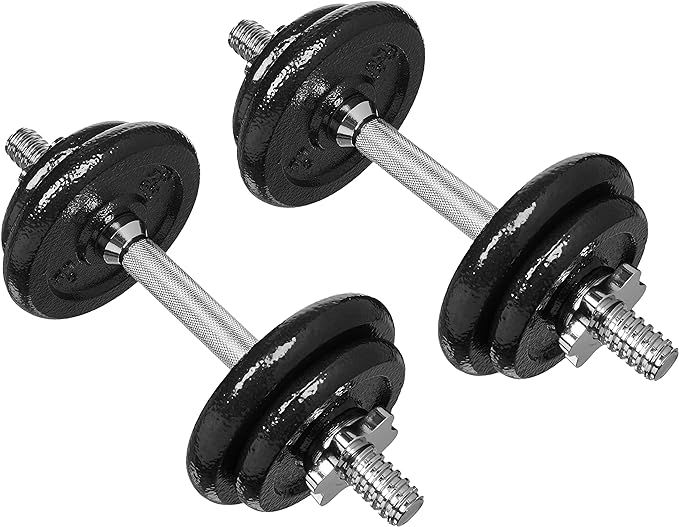
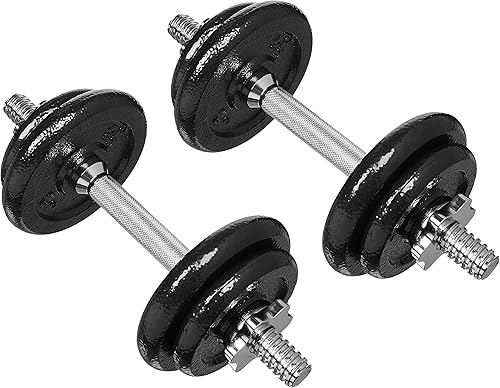
What is the best shim material for leveling a power rack?
Galvanized steel structural shims are the only material we recommend under a rack rated above 1,000 lb. Plastic composite shims compress under sustained load and creep over time. Cedar wood shims (the kind used for door framing) crush within weeks. Pairs of tapered steel shims placed point-to-point distribute the load across the full base plate without creating a pivot.
Do I need to use a self-leveling compound for a Rogue rack on old concrete?
Only if the slab is dished, cracked, or has gouges deeper than 1/2 inch under the rack footprint. For typical drainage slope or minor surface waves, shims or threaded leveling feet are faster, cheaper, and easier to adjust later. Self-leveling underlayment is the right call when you are building a permanent platform you do not plan to relocate.
Will threaded leveling feet void the Rogue RML-490 warranty?
Adding aftermarket leveling feet that thread into the existing base-plate hardware holes does not void the structural warranty as of 2026, but drilling new holes through the base plates does. Stick with leveling mounts that use the factory 1/2-13 anchor holes. If you are unsure, email Rogue customer service with the part number of the leveling foot before installation.
How do I check that my rack is plumb, not just level?
Level means the base plates sit flat. Plumb means the uprights point straight up. After leveling the base, hold a 48-inch level vertically against two adjacent faces of each upright (front and side). All four uprights need to read plumb in both axes. If one upright is plumb on the side but tilted forward, the base shim under its rear edge needs more height, even if the base plate reads level. Plumb uprights are what keep your J-cups and safeties at matching heights left to right.
Should I put horse stall mats under the rack feet or just on the platform?
Run horse stall mats wall-to-wall in the rack area, including under the feet. The 3/4-inch rubber compresses uniformly under each base plate and absorbs minor floor irregularities, which actually helps stabilize a free-standing rack on a slightly uneven slab. Just remember to re-level after the mats have been loaded for a few weeks, because the rubber will take a small initial set under the rack weight before stabilizing.
Key Takeaways
- Choosing the right level rogue rml-490 rack uneven concrete means matching capacity and output ports to your actual devices
- Always check actual watt-hours (Wh), not just watts — runtime depends on Wh, not peak output
- Also covers: rml-490 shim uneven floor
- Also covers: rogue power rack uneven garage floor
- Also covers: leveling power rack concrete slope
- Compare price-per-Wh across models to find the best value for your budget